In March 2018, Nate Bolduc posted his adventures with a 1956 CJ5 and the restoration of a Stratton Hydro-Implement Lift on the EarlyCJ5 forum. The complete story is available at http://www.earlycj5.com/xf_cj5/index.php?threads/i-cant-leave-well-enough-alone.129527/
Nate’s pictures and descriptions of the restoration have been extremely helpful in our research of the last of the “‘Jeep’ Approved” hydraulic lifts. We are presenting a summary of Nate’s restoration story, taken from the longer post.
Nate’s story
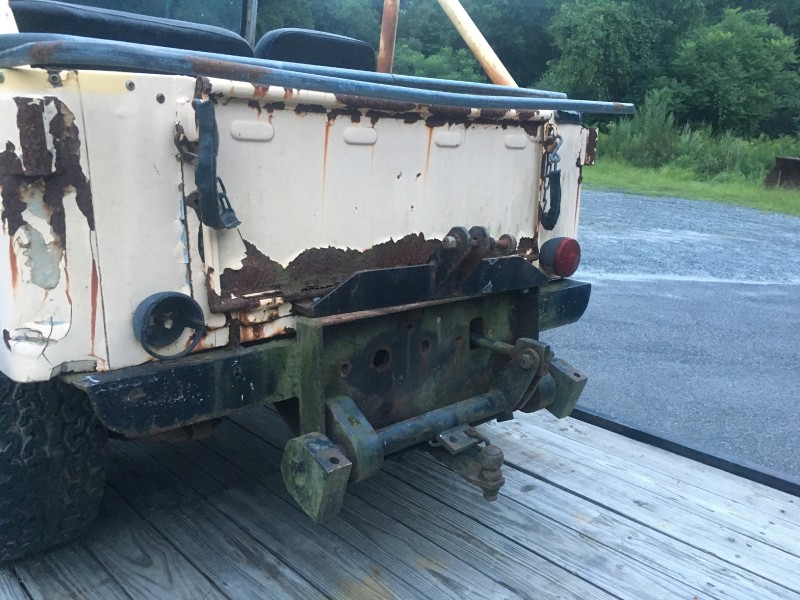
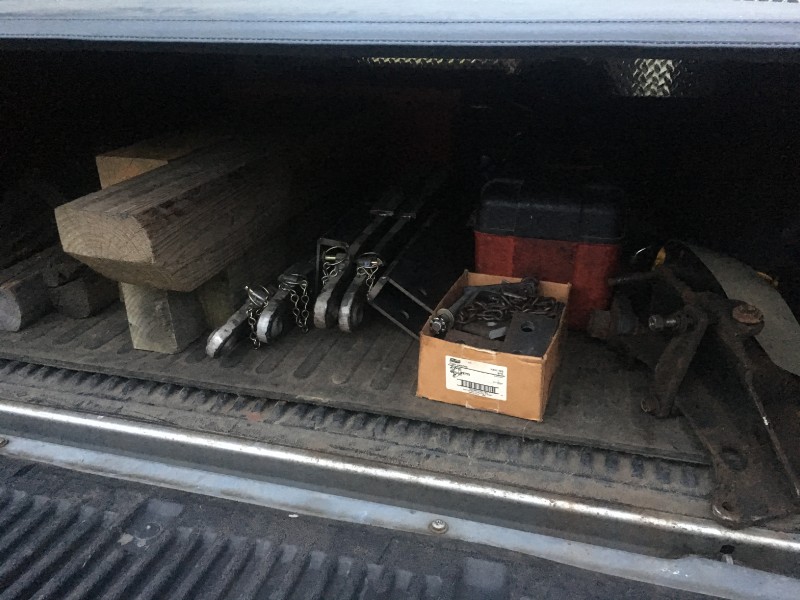
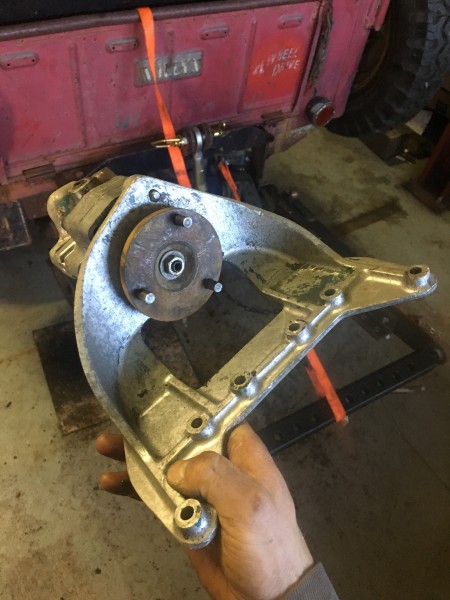
“I picked up the last piece of the puzzle today. It’s a 63 cj5 with a Stratton 3 point hitch. Last month I scored a complete rear PTO setup with a front ag weight.
It has new arms, all the heavy duty rear springs, helper coil springs and new decals.
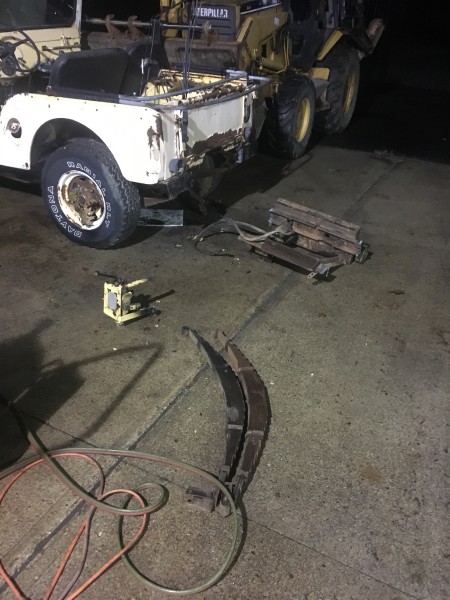
Now I just have to debubbafie it, clean it up and put it in my cj5.

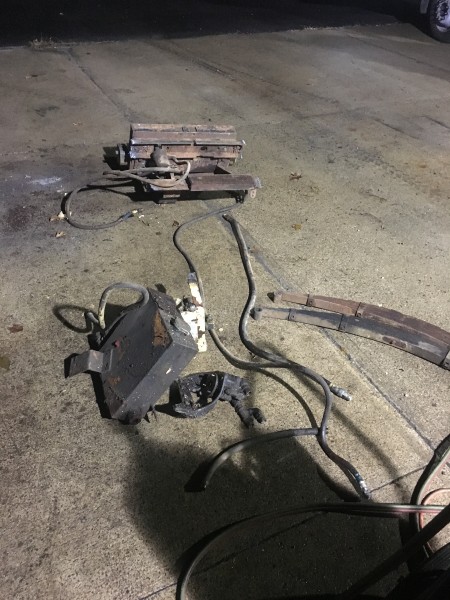
Put the hydraulic tank for the stratton hitch in.
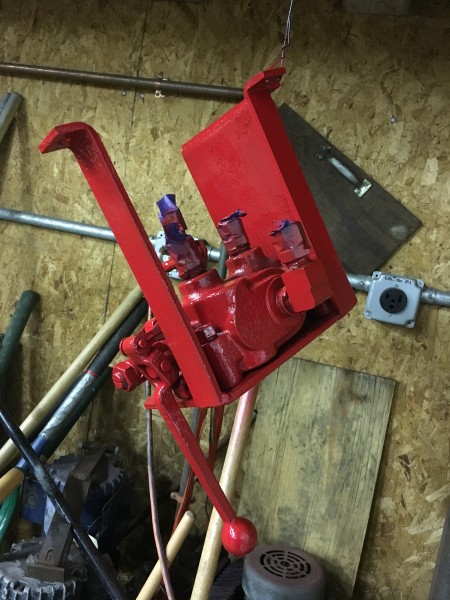
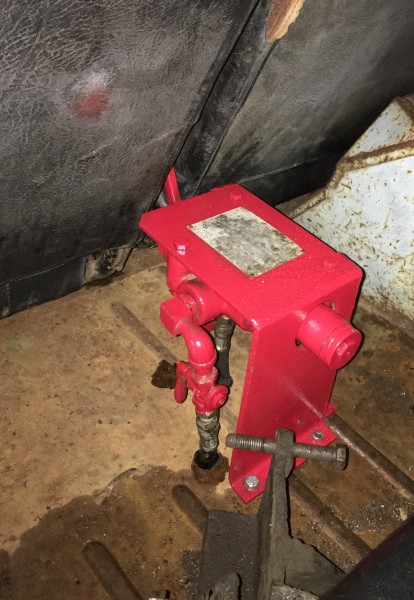
Cleaned the old paint off the control valve and discovered it was originally red. I put it all back together and painted it like it was originally done, paint on bare steel.
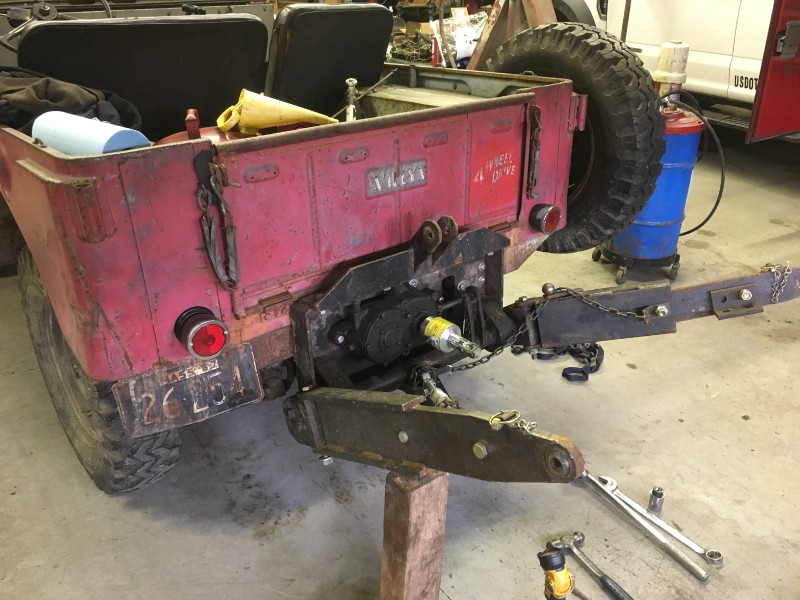
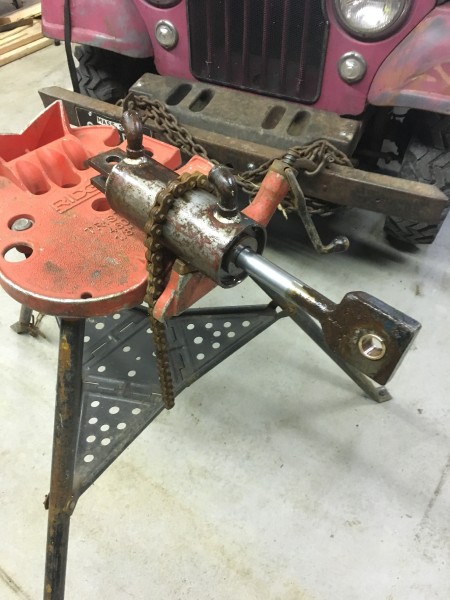
Got the hitch on tonight! It was quite the battle, but its there. Now to make it work…
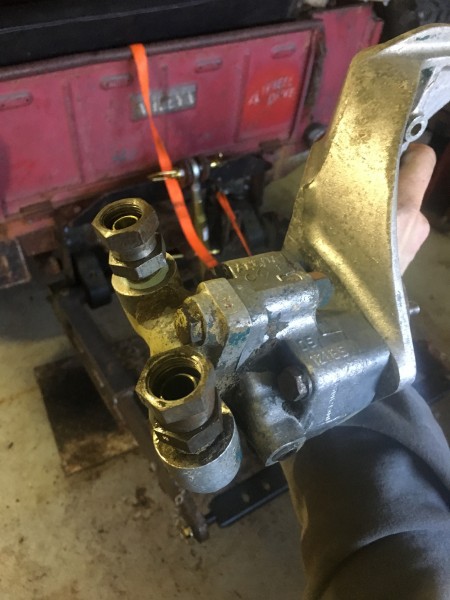
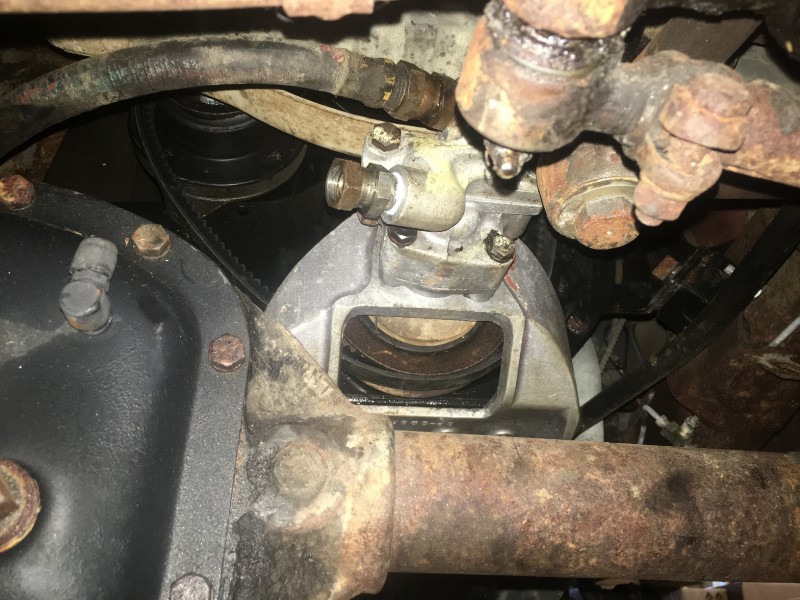
I got the hydraulic pump installed. Tomorrow I hope to get the valve in and try it out!
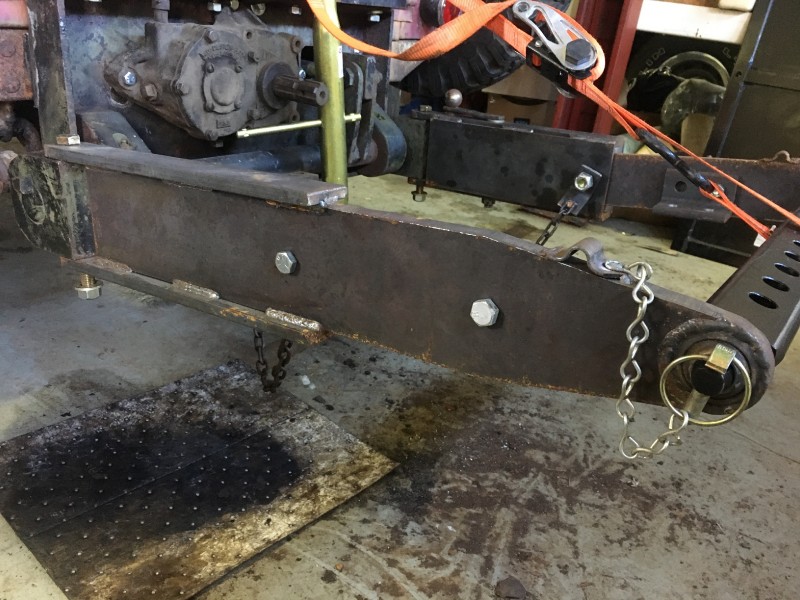
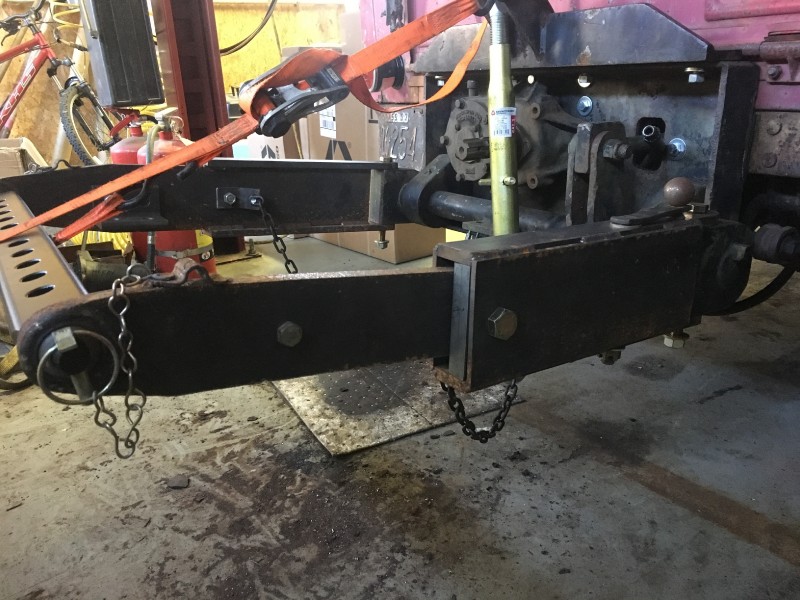
This arm is adjustable just like on a tractor.
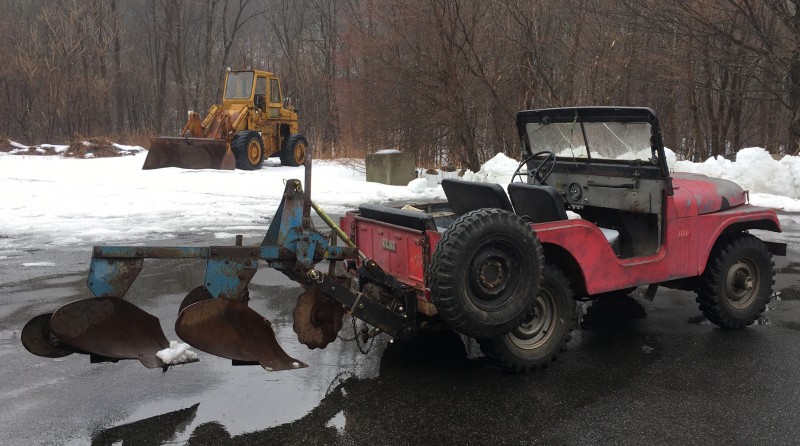
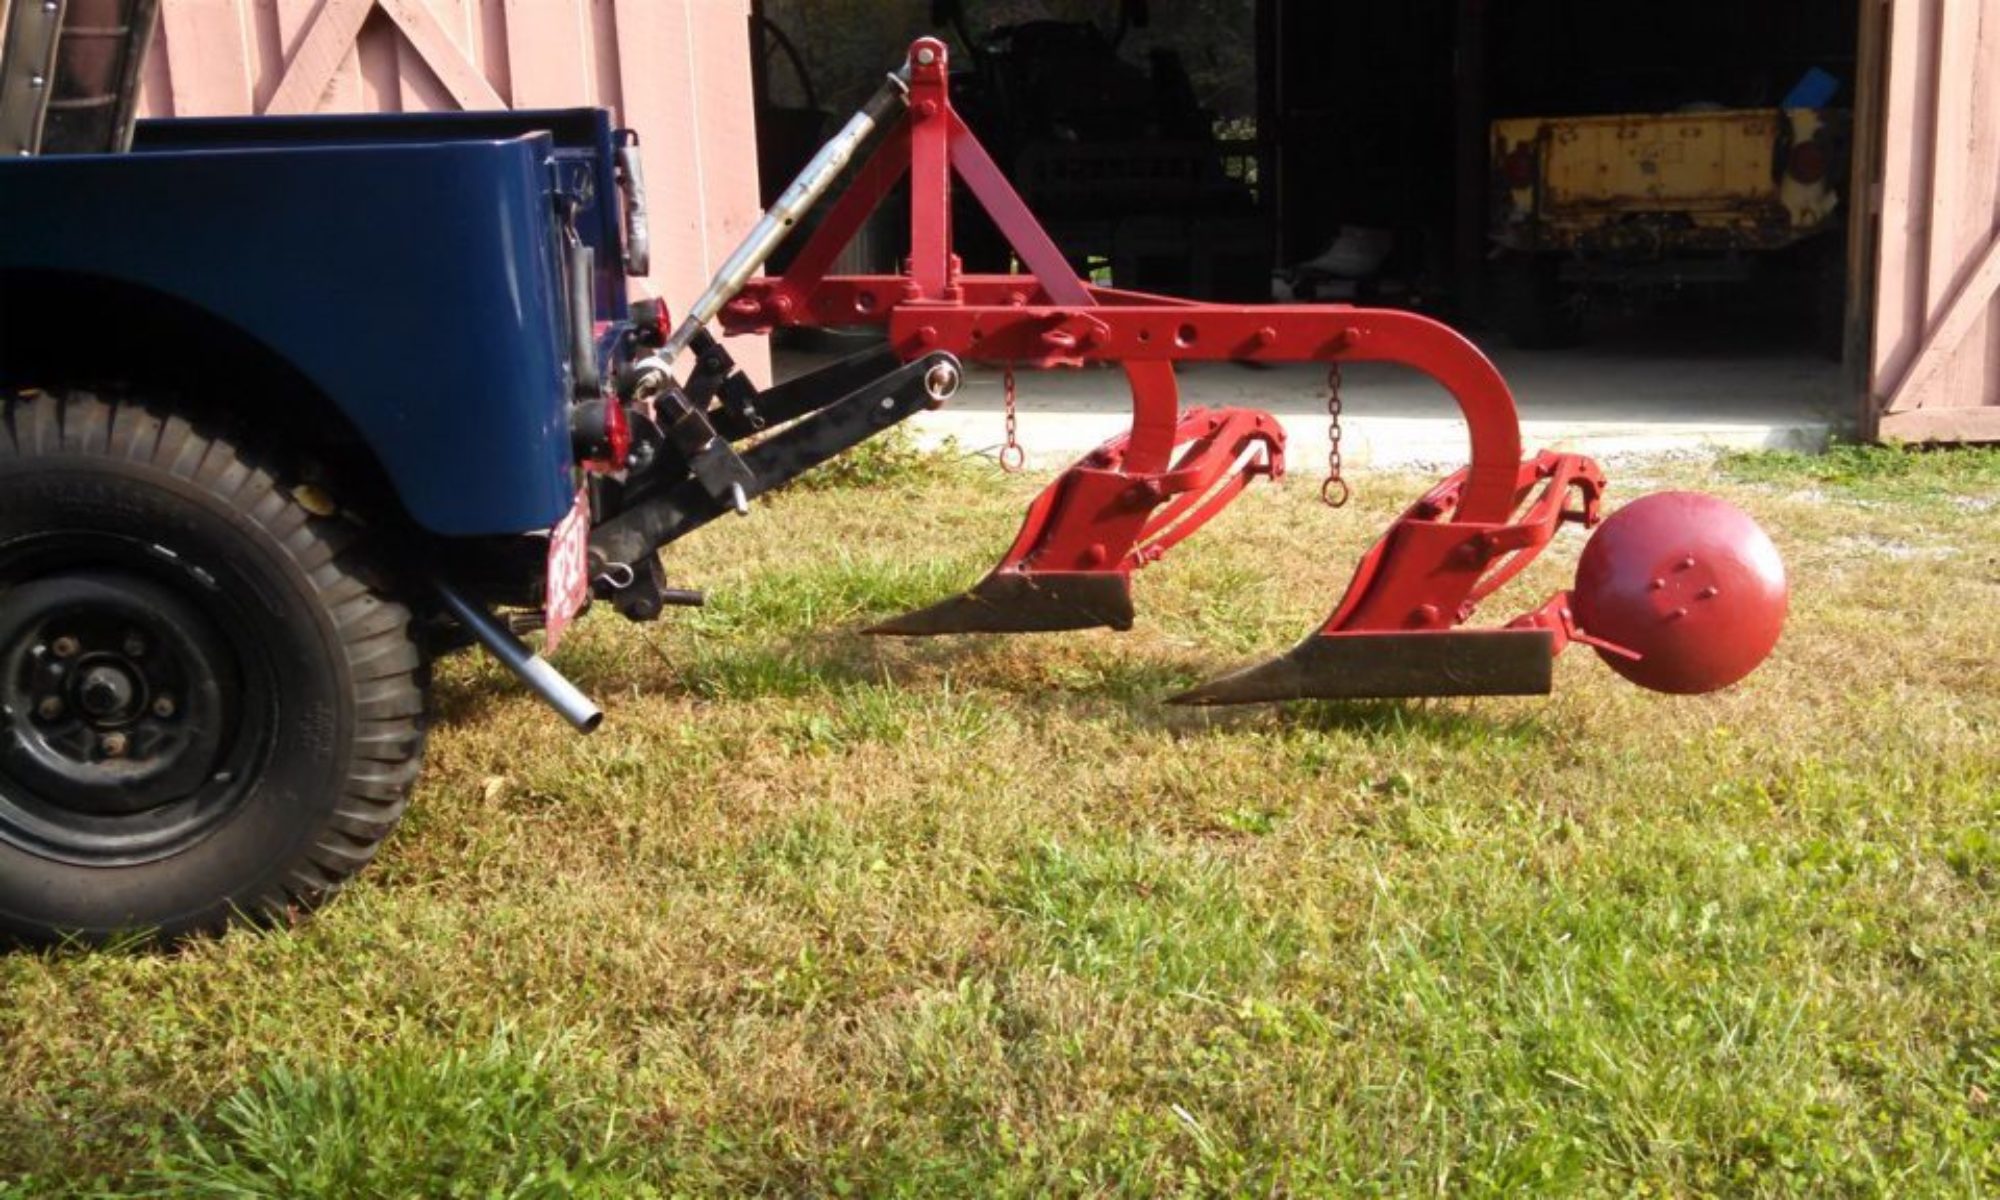
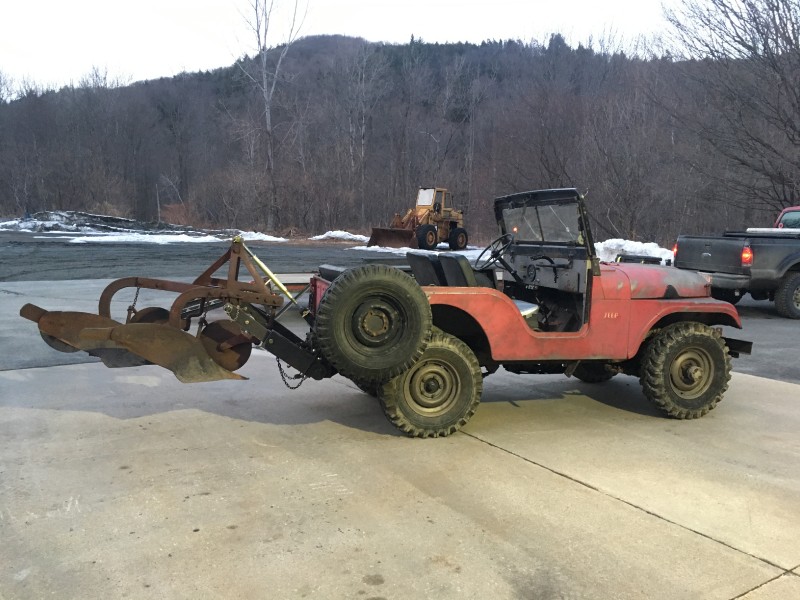
Got the 3 point hitch working today! I need to either get a smaller plow or remove one of them. I don’t think a CJ5 can pull a 16″ two bottom plow on the plow day I’ll be doing.
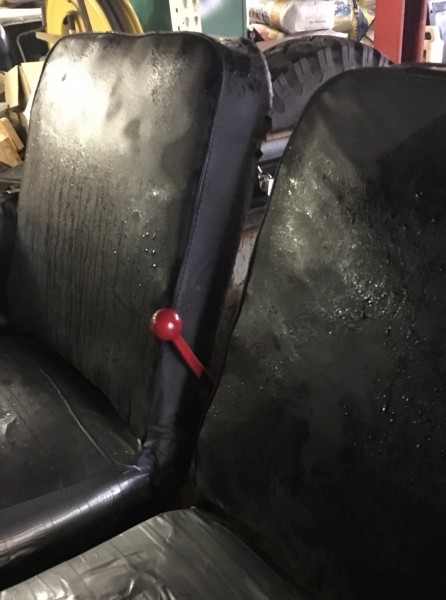
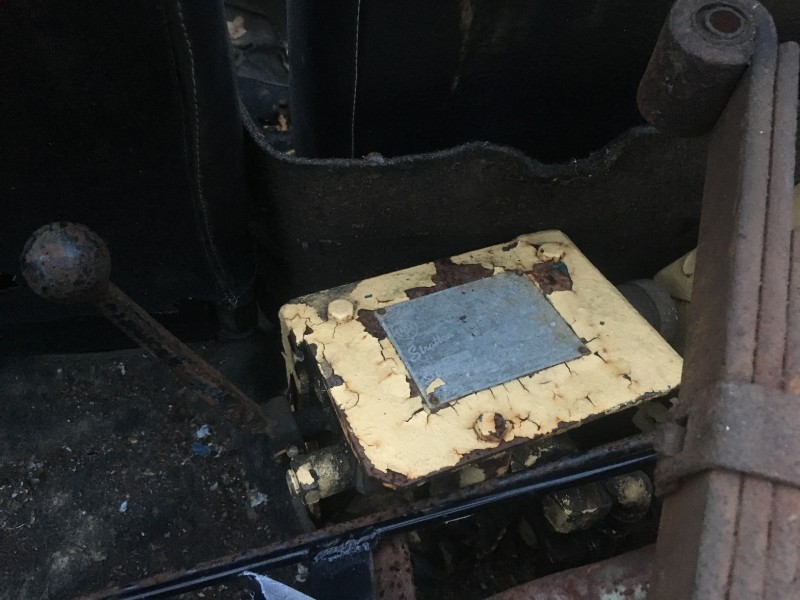
And I mounted the control valve between the seats. It is supposed to be further forward, but I have the 60/40 seat.
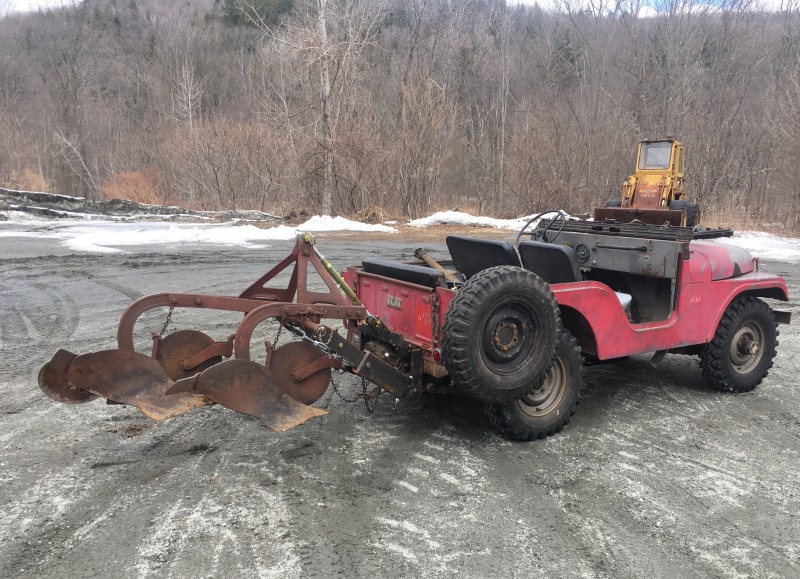
Major progress made today. I found a smaller 2 bottom plow. The Jeep doesn’t squat so bad now.
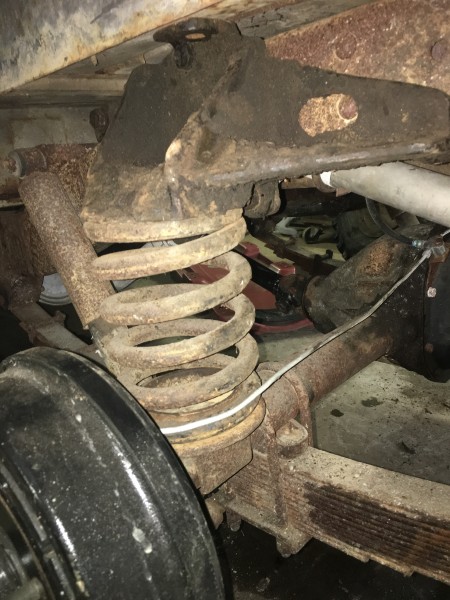
I added some helper coil springs from a trencher jeep.
After installing the springs. It sits MUCH better now. It rides really hard now with no weight hanging off the back and seems more bouncy now.
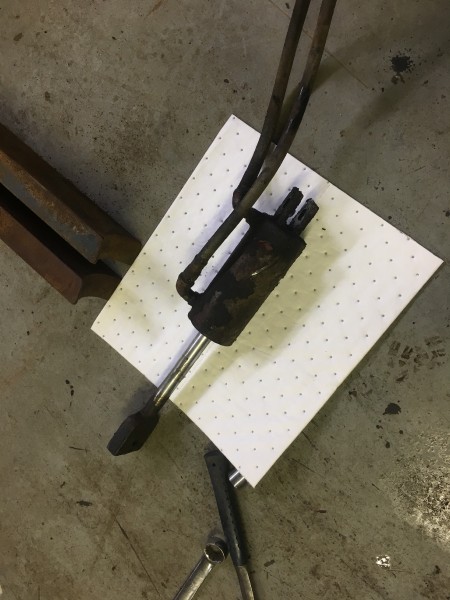
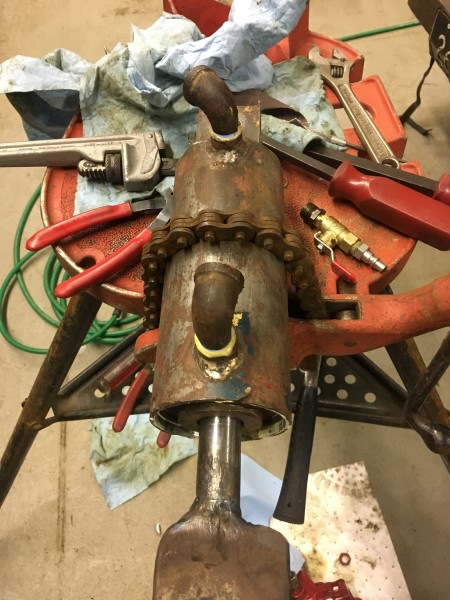
Last year, the hydraulic cylinder for the Stratton lift started to leak internally. The lift would drift down and I could pick it up by hand too. I figured the plunger seal had blown. Yesterday, I tore into it.
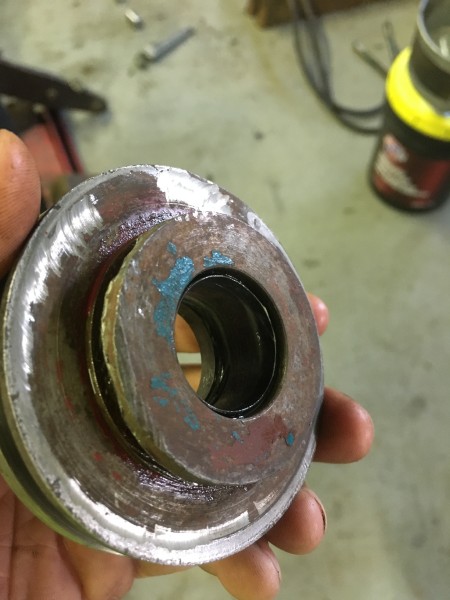
After degreasing it, I found there was a big snap ring holding the gland on. I was also happy to see some original red paint, so I know this is the original cylinder to the Stratton lift.
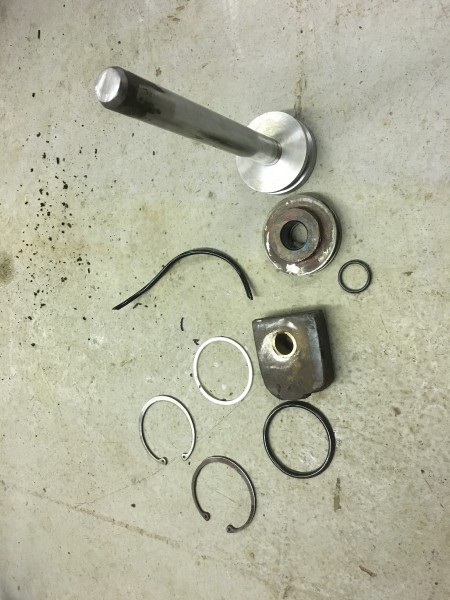
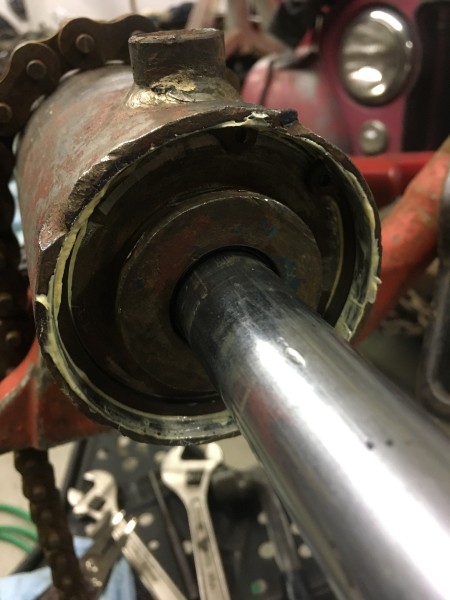
After removing the gland, there was the same snap ring inside to keep the plunger from coming out. It is a very simple cylinder, just a bunch of O-rings. The O-ring for the plunder had torn, which I knew.

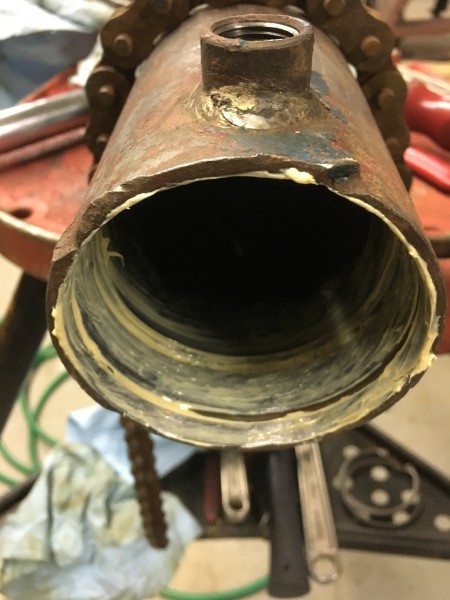
The eye of the cylinder had to be cut off in order to remove the gland and replace the O-ring seal on the shaft. The rod is staked in place to the plunger.
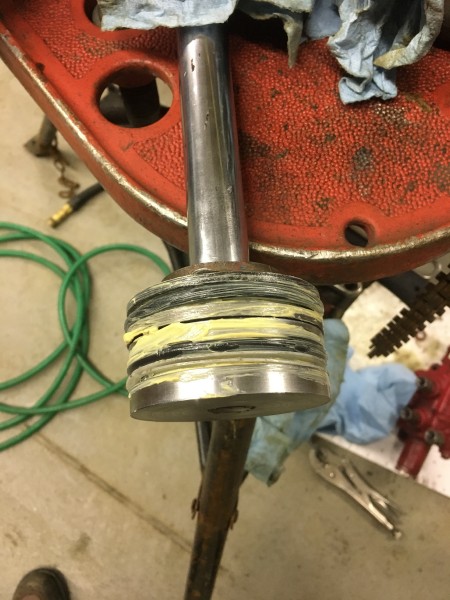
The old rod seal (right) was very hard and pretty worn. I replaced it with a standard O-ring from my kit.
I installed the new seal with some white lithium grease.
I checked the dust seal and it seemed to be okay, so I decided to leave that. I did scrape out the gunk that had built up around it.
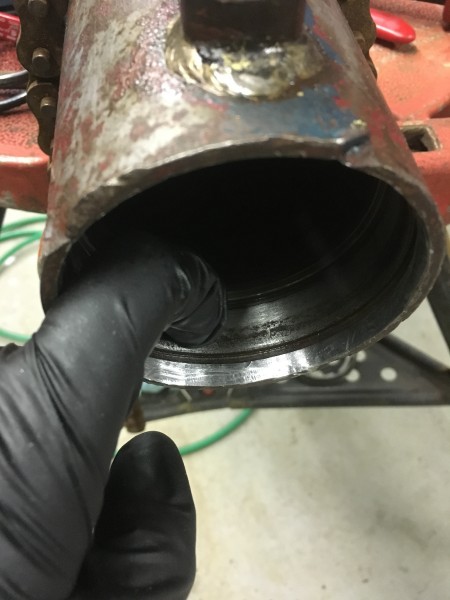
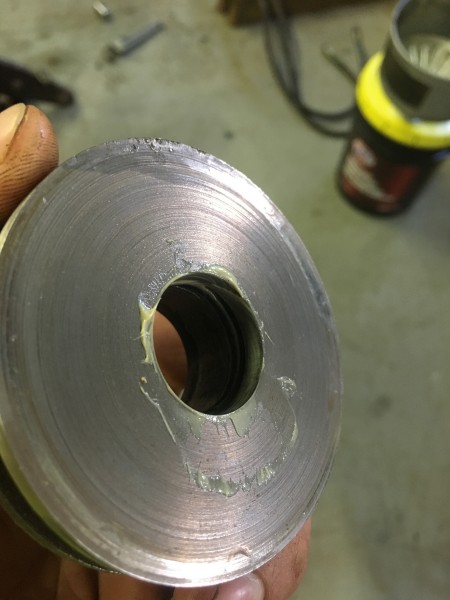
Then I sanded the rust off where the gland was. I was careful to not hit the bore of the cylinder.
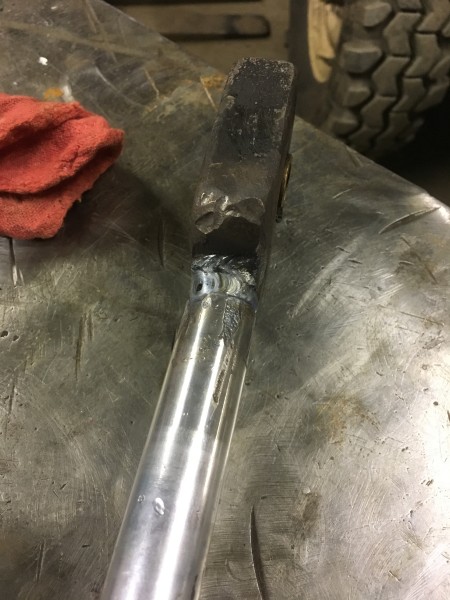
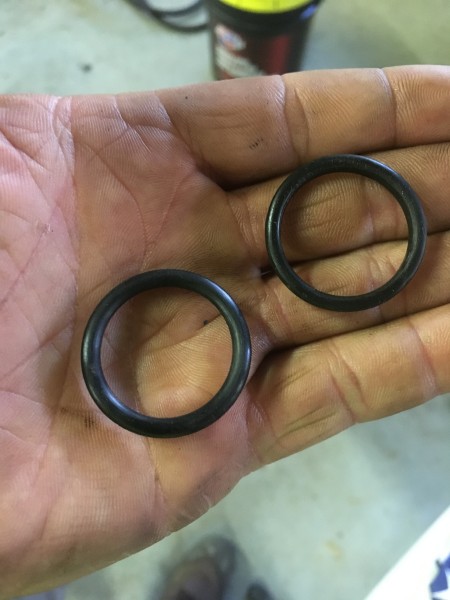
I tig welded the eye back on the end of the rod, keeping it straight and aligned. Of course, I put the gland back on too. Monday morning, I’ll go to my local rubber supply company and get the two large O-rings I need for the plunger and gland.
I picked up my O-rings today to finish the rebuild. I put the weird plastic spring? behind the O-ring on the plunger. The gland had no backing washers.
Lubed up the bore so the O-rings wouldn’t cut when sliding them in.
Gland and outer snapring reinstalled.
Prior to putting the cylinder back in the jeep, I air tested the cylinder to make sure there were no leaks.
And …. the results
Nate followed up his restoration by creating a Stratton Lift Registry at http://www.earlycj5.com/xf_cj5/index.php?threads/stratton-lift-registry.135158/ If you are an owner, we encourage you to add your lift to the list.